One of the first tasks we were given was to research into our favorite character designers and also some concept artists based on our personal tastes in media. This could be games, movies and TV shows. We would need to pick three and carry out research on them.
Character Designers
Iwao Takamoro

https://galleryofmodernart.wordpress.com/portfolio/iwao-takamoto-original-animation/
[Accessed 01/12/2019]
I like his style of work because Scooby Doo was my favorite cartoon growing up. His use of line in his characters is very casual and this is what I find endearing about it.
Tim Burton
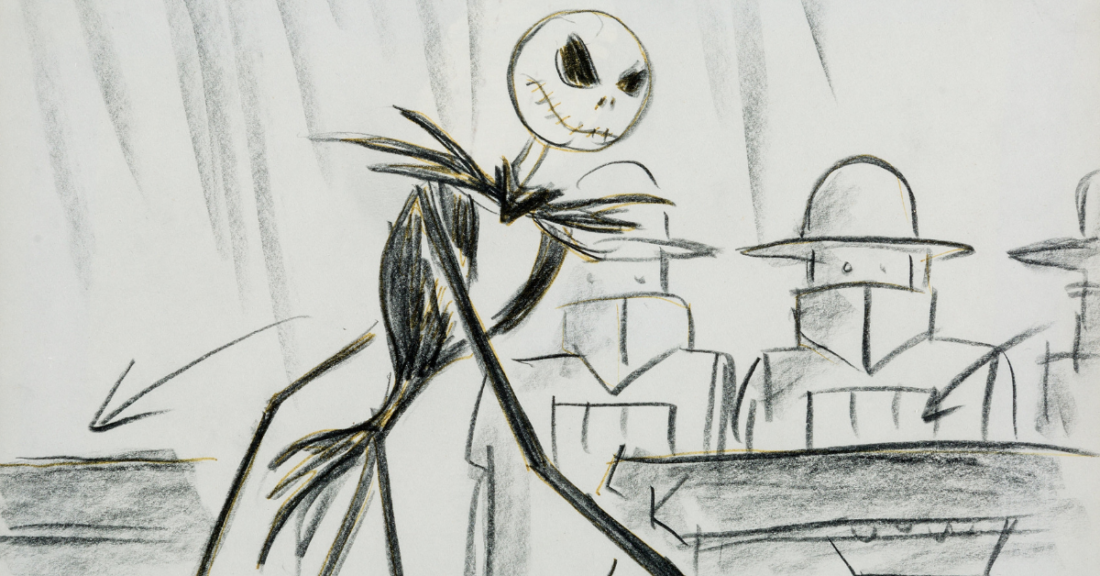
He has a more Gothic style and tone to his work and although he does films mostly, one of his best animated films in my opinion is the Nightmare Before Christmas. How he designed the character to be very thin and spooky matched perfectly with the characters personality.
Tetsuya Nomura

Arguably one of the most heavily detailed characters you could design for, Tetsuya Nomura designed the characters for the Final Fantasy franchise. This would be helpful in seeing how a character can be overly detailed but still legible as a person.
Concept Artists
Guy Davis

GuyDavis use of details in this concept design is strikingly beautiful. He is able to keep it dark while at the same time also using very little colour to convey this character.
Nicolas Ferrand

I chose this concept artist because this design in particular is made from very asymmetrical shapes which creates a appealing spaceship design.
Steve R Gordon

I chose him as a concept artist because his use of watercolor in this concept of this character is very.The use of yellow and red is a effective combination of both colour and harmony.
Creating Character Designs based on the theme of circus.

The first step was to research around the theme of circus. pinterest and google images allowed me to get a glimpse at the kind of characters that are featured in a circus.

One of the first tasks we were given was to do a bit of life drawing of regular people in my university city – Lincoln.

I chose multiple people of different sizes that I felt that I could create a circus themed character out of. I found useful to be quite free as this would lead to several quick sketches rather than just a few here and there. Tried covering as much as the page as possible.
After this I decided that a strong man would be good for a human character design. I also nearly picked a trapeze artist although I couldn’t find a strong reference. Strongman would be good as along the process of creating the character I would also be able to develop my knowledge of anatomy.

Above is one of the strongman sketches I felt was the most strongest out of all my rough life drawing sketches. This is because I used simple forms to show different parts of the body. The style I have gone for in this sketch is quite similar to the ones you would see in the Animators Survival Kit.
Human Character Design For Circus Theme – Strongman
Human Character Concept Design (+ Thumbnails)
Process

Using tvpaint I digitally made a mock up of my traditional sketch from the life drawing.
I would then go on to use this later in my thumbnail sketches.

Multiple layers were created digitally to try out some initial ideas I had. This allowed me to be quite free and not overly worry myself with the physical appearance just yet. I tried taking into account the design element of balance to create a visual equilibrium in my character concept thumbnails early on.

Digitally recreating the one I liked most. I decided the one in a weightlifting pose as this seemed the strongest of all 4 original thumb nails.

At this stage I had a more refined character with colour and this would become my concept design. I also added some space around each design as the overlap was very confusing to see.
Thumb nailing and creating a concept design taught me how to sketch out a rough character and to try different designs in the early stages of the character design. . As proportion and perspective would be added later it would be important to start off with a design that is appealing.
Final Human Character Concept Design (+ Thumbnails)
Splitting what I had from my thumbnails and the concept design allowed me to take it further by adding a description of how the character should come across. The human character was given the name Strong Stan as it has a catchy ring to it. Also the character traits I thought of using were a confident, Strong and attention seeking strongman.
Process

Used boxes and simple shapes like a circle to create four different designs that could be taken forward later in the construction of the character.

I chose the one that would best meet the basic criteria for my circus strongman. Strength was shown by how he could hold up a bar while simultaneously carrying two people. Attention Seeker can be seen by how he is shouting and is not wearing a shirt which also shows confidence in his self-image. I learnt it is good to check against the character notes. To ensure I do not end up creating a completely new design halfway through development.

Created some very basic gesture drawings to show the human character in a pose with a bit of painting of a darker shade to emphasize the white lines. Having this as a guideline would make the next step of blocking and refining very simple. Perhaps black would have been more useful and easier to see.

At this stage I was trying to round out my gesture poses by placing block shapes on using my own sketch as a reference. This helped with having unity in my work as the design can be seen as taken forward from the rest. A back shadow shape was added as it created a backdrop and contrast to the lightly coloured background.

I learnt that the original concept design is important to give yourself and any other designer the rough and loose idea of where the character began from. This one being a typical strongman with traits that would be common for this type of character. This was done on purpose to create a character quickly. Although slight personal adjustments were made such as a Mohawk, weaker legs and a big beard.
Construction sheet of the Human Character
Process

Started by creating a A3 canvas that would include a logo I would place in the top right hand corner. I did this as it would make life easier by starting out with a basic frame/canvas from which I could apply my designs too.
Typically in Art, brown paper is used as a mid tone to effectively show value in objects rather than using white or black. I applied a similar method by colour filling the background brown before going ahead with any further drawings.
It is important to have some kind of identity on your work so I decided to come up with a logo. I did this originally by making a pencil drawing and then going over with a Biro pen from my stationery set.

This was sketched out in my personal sketchbook and I learnt that it may have been quicker to keep everything digital as this took up to 20 minutes to create with traditional media. I used crosshatching to quickly fill in black. The only issue I occurred was that with one black pen I would be limiting myself to monochromatic designs.
A logo based on my initials and also my favorite character growing up Ben 10, who has the well known omnitrix x on a watch. This creates a strong identity which would be memorable from first glance.
Character model/construction sheet reference
Simple to understand although I chose not to continue with a turnaround as that would end up becoming a separate document of work. I instead decided to keep a 3/4 Front constant while each stage would build upon the last.

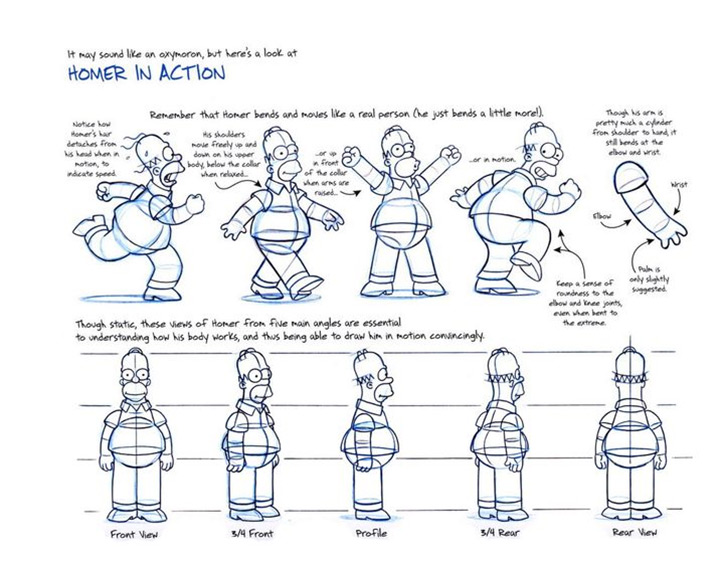
Started by placing, at the top left, increments at each stage of construction all the way to the top right. A layout technique I was inspired by from the Homer Simpson Reference.
I then added in head height and as the character was going to have different proportion e.g. a larger torso. This was done as a second pairs of eyes would have no idea how big or small the character would need to be.
I began adding stage by stage using basic shapes how to construct a near enough refined character.
This would set the stage for further development although stage one to two on second glance seems to be very quick. In future I would try and identify this problem early and correct it before moving on.

Adding one more stage to the character construction allowed for a final line work to be seen and where an individual may finish off the characters construction. Also expressions allowed me to better understand the kind of personality he would have. From my own knowledge, I was able to construct 4 basic expressions to be placed in the top right hand corner of the sheet

I didn’t like how crowded the page seemed so I reorganized some of the elements to different locations. Bringing the expressions down allowed the sheet to be read in a logical fashion.
Final character was coloured from a front view with colour in case a further version would need to be required. This was learnt by studying similar artists works on character construction and analysing their use of Composition and Layout – a key design principle.

Preferred Pinterest Circus Strongman Reference

Collegiate Muscle (2016) The Free Weight vs Machine Debate. Edward Wood. Available from
https://collegiatemuscle.com/free-weight-vs-machine-debate/
Accessed [01/12/2019]
Adding a pose reference allowed the character to be seen from multiple angles both in the facial expressions and a confident pose from a real life strongman. I did this because it would allow for an accurate representation rather than what I thought the character should be posing like. That could have lead me to posing him incorrectly and causing confusion within the viewer.

Using a basic line work I added a line layer on top of the reference so I could then add the blocks of body that would add vanity to the characters personality. Line can be used to tell the viewer/user whether the character is important or is masculine or feminine. Using a combination of curves to get the right gesture and then keeping the chair as a realistic marker point.

Finished off the posed character by adding a background colored layer and adding final line-work and colour to it.Also added a brown box layer to make the text stand out stronger. I felt that the construction sheet was a a final stage although the expressions seemed to distract from the actual construction steps that can be found above the expressions.

I changed the layout of the construction sheet while also changing the color scheme. I felt that a grey tone would help the character stand out more. also a few changes such as moving the text around for a simpler clearer view of relevant information like titles and steps needed. Added the word ‘Human’ in front of the word character to not confuse whoever takes a fresh view at my work. Also created a hierarchy composition with the main heading and subtitle to help with readability and organisation

Added step by step instructions on how to construct the character based on a reference sheet, I found in my research stage of construction sheets. I also added in a rhythm arrowed line to lead the users to the next step in a logical way.
I learnt how it is useful to be technical at times but also explain it as if you are not discussing your character with someone who has no prior knowledge about design.
Final Human Character Construction Sheet

I also added the pose from an earlier sketch as the angle I felt suited the characters personality. That being his character trait which is being bold and confident.
I also removed the expressions as although they show the construction of the face, It distracted from the step by step construction that the construction sheet should be used for.
One small thing I picked up on was how the perspective of the chair is wrong. A fourth leg of the chair would be slightly seen although this is a minor detail that can be fixed at a later date.
Human Character Expression Sheet
Process

Using reference from vector illustration expressions on which I based my human character expressions on. It is useful to use reference although I later realised it would have been more beneficial to draw from life.

Took the expressions from the character construction sheet and added them to a separate document. Also added a few more more that the client may need such as shock, laughter, smolder and sadness. Shock because they work for a circus and would be on edge quite a lot.
A risk taker trait, Smolder because the character has a narcissistic tendencies. the other two are just general expressions that add more to how the face of the character moves.
With the expressions taken from earlier I tried to use a bolder line to show emphasis to create an eye catching relationship between the inner and outer lines for the human characters face.
What I learnt
I learnt that having an expression sheet, although something you might not need can help how to construct the characters head and how the facial muscles interact with each other to create a more rounded character.
Human Character Turnaround
Process

I chose this reference as a starting point as I liked how simple and block it was. Also the three tones would make it simple when it would come to rendering later down the line. This was part of my early research before attempting to sketch or draw out any ideas. Although the reference is female in nature, a few tweaks such as mostly angular lines would correct the form into a masculine pose.

The first step was to create four boxes for each view. Then was to insert the line-work version of the character from the construction sheet. Then I traced the front view also from the character construction sheet but creating it in a blue sketch layer with lowered opacity.

Added a blue sketch layer of the side view and also duplicated the front view blue sketch layer. This accelerated up the process as rather than creating a separate back view, copying and pasting would work as the back view is just a reverse inverted type of front view of the human character

Completed the final line-work for the side view line-work. This gave me confidence to continue but I would have made the design simpler if I was to attempt a human character turnaround again. I ran into time management issues and animation designs need to be somewhere between simple and complex depending on the theme and brief.

Finished off the front view line-work of the character and then duplicating for the back view. This worked similar to copy and paste and was done to speed up the process as people rarely look at the back.

Added greyscale tones behind each view to create contrast and ease the viewers eye from dark on the left to light on the right. I learnt that this was a good idea as it created a stronger appearance when I zoomed out 400% on Photoshop.

Added colour to the character using an online color pallet maker. I chose the colours – red, black,cream, blue and a slighter more saturated cream to continue the process of a character turnaround. Also added the names of the view just for further clarity.
Final Human Character Turnaround

Changed the name of the sheet to Human character turnaround as Character turnaround seemed too open to misinterpretation.
Overall I learnt how to create a Human character turnaround given a theme. It was important to understand how to create different angles of the character so when presenting it to a production team. They can see how all around the character will look.
Animal Character Design For Circus Theme – Giraffe
Animal Character Thumb nailing + Concept Design
Process

Using shapes to experiment with different forms for the animal allowed for more unique designs. I learn that a giraffe doesn’t have to be symmetrical to look aesthetically pleasing. Asymmetry can just about be as beautiful in design as symmetry is.
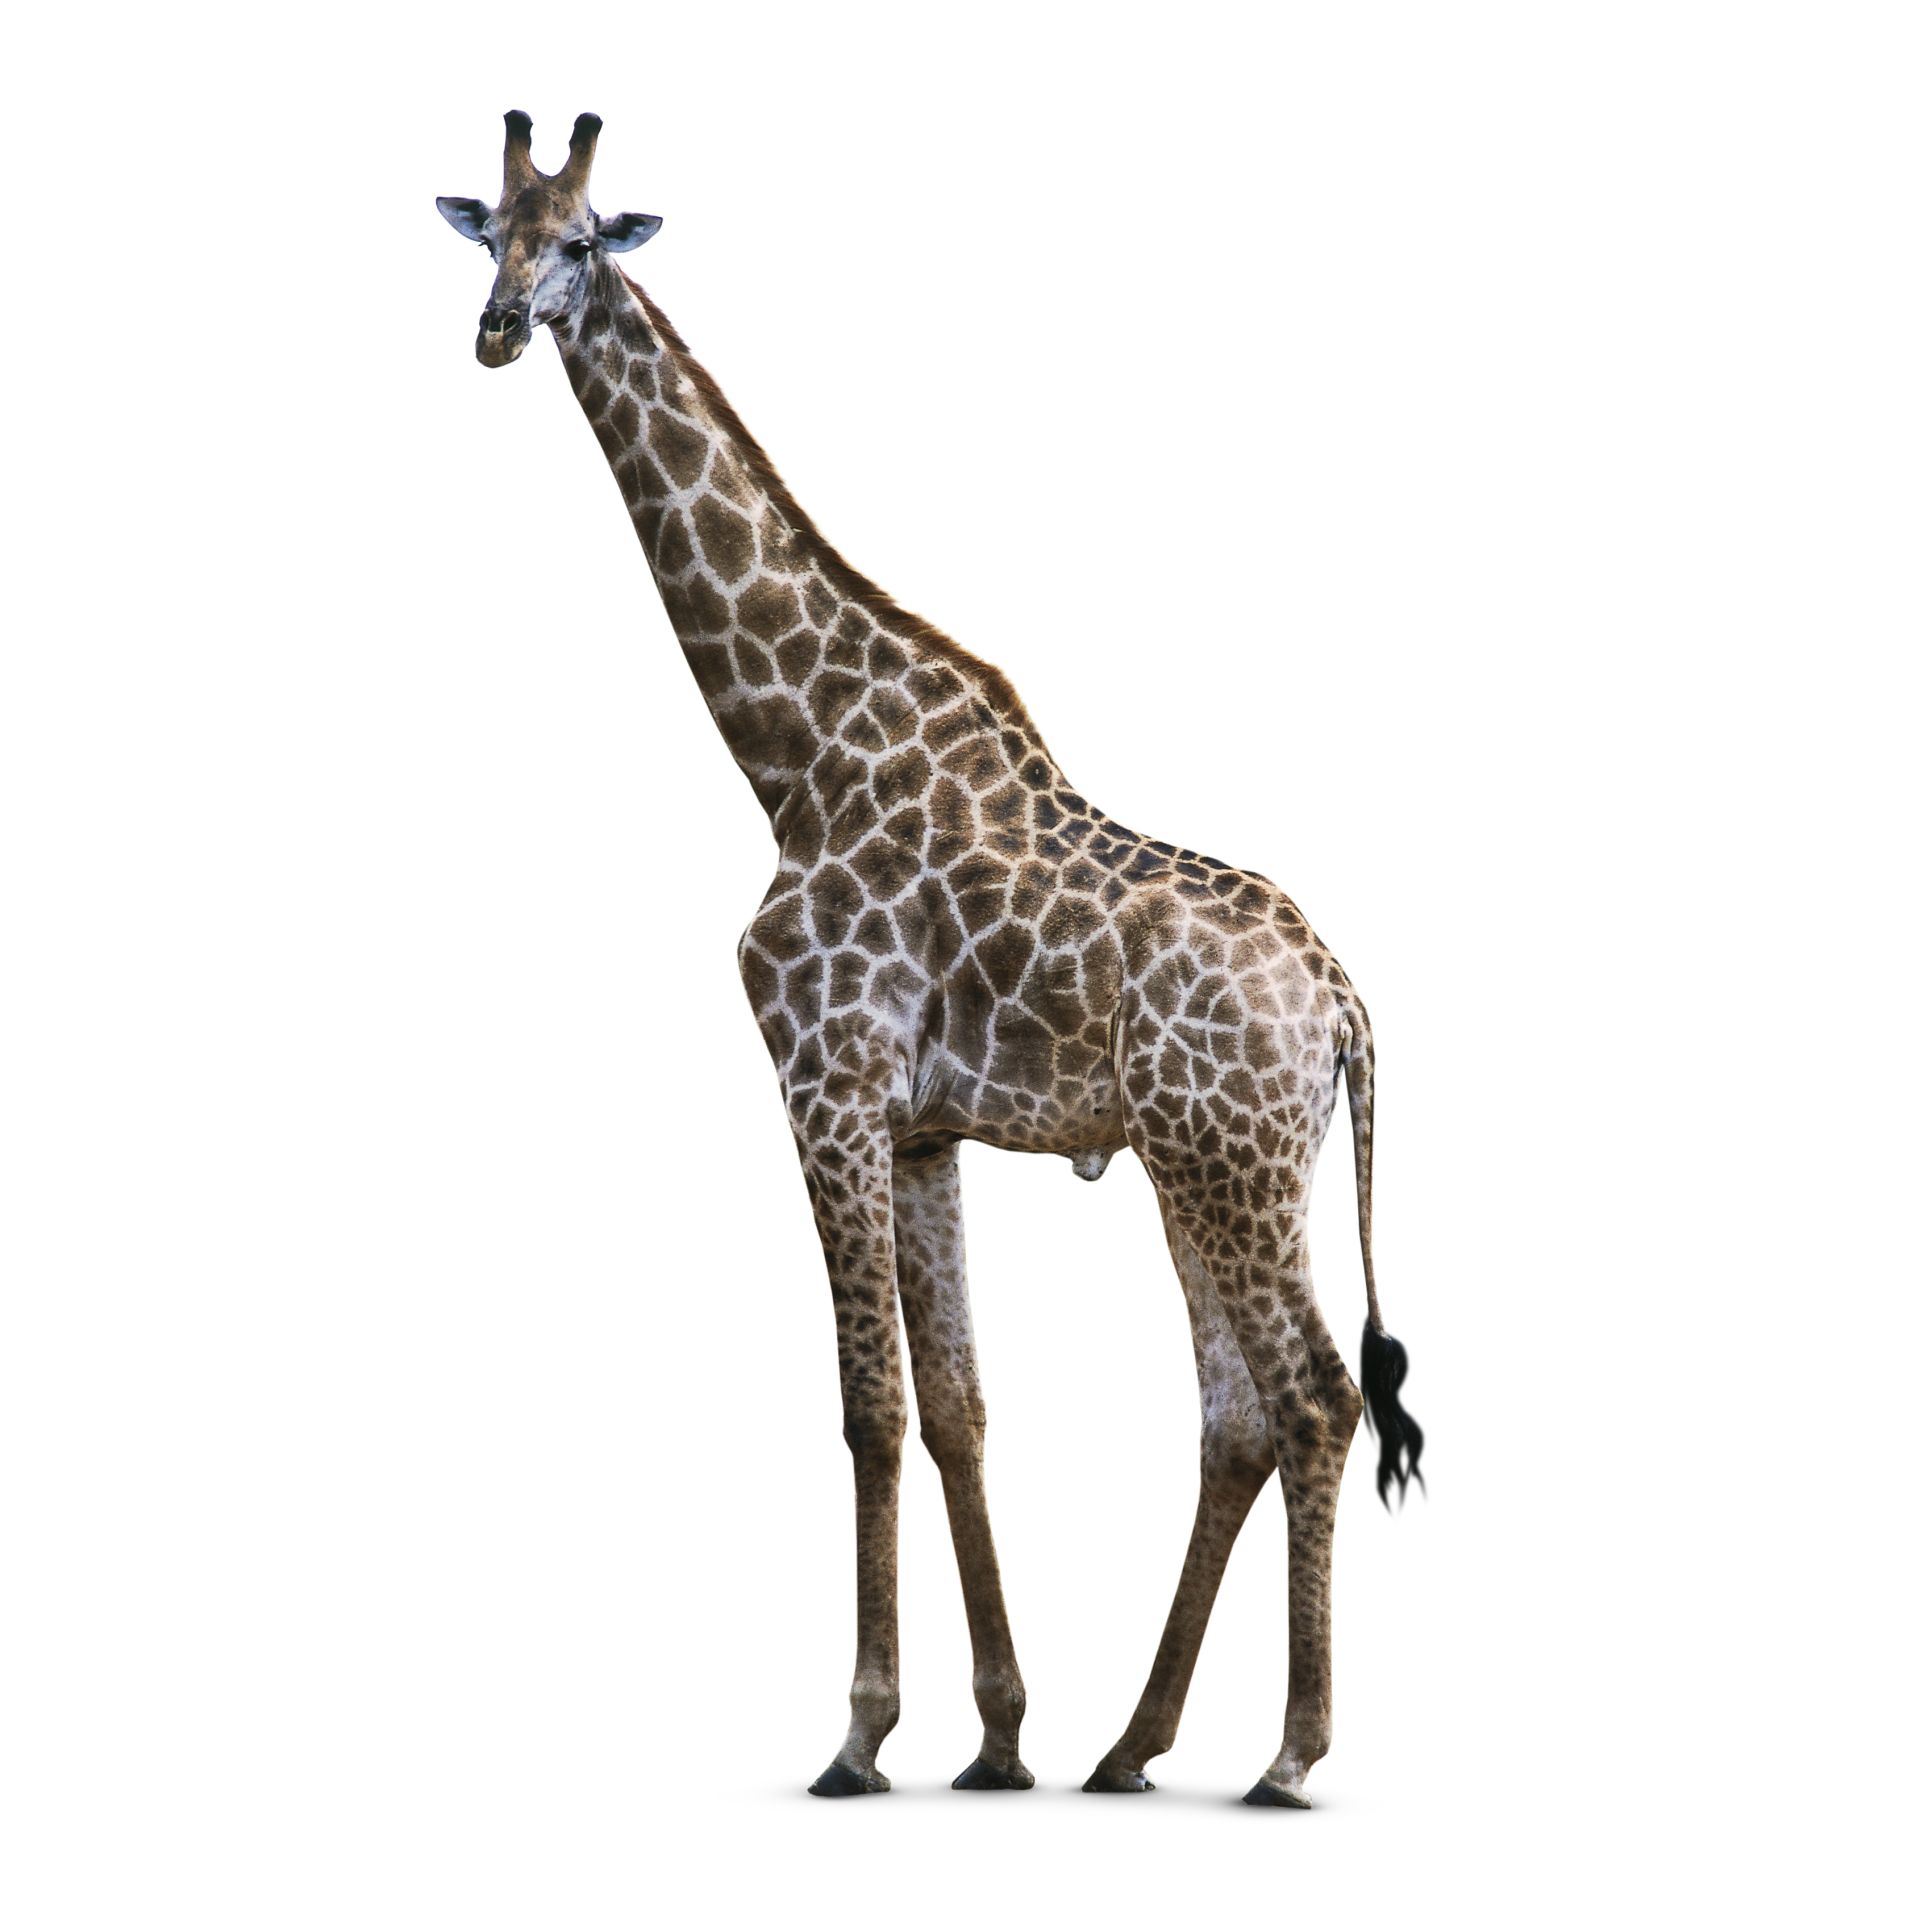
I chose this giraffe reference as it would allow me to see most of the details and shapes of a giraffe. This proved beneficial compared to a front view and I was able to see how the neck arches and also how the back legs connect to the main torso of the animal.

Played with shape theory in Photoshop by sketching a realistic giraffe in the middle of the page and trying out different proportions, shapes and lines to see what I could come up with.

Manipulating the face using the golden ratio resulted in a face that seemed appealing whilst also having good proportions from which to stem from. I was able to do this by first looking up the golden ratio to fully prepare myself on how to use it in design.
Golden Ratio Reference
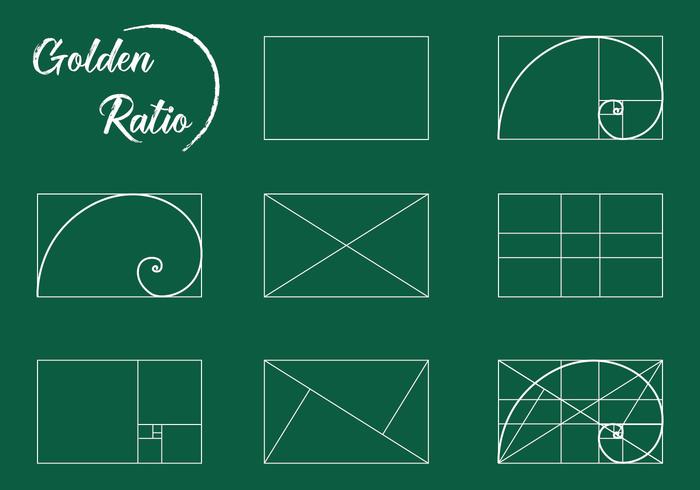
The golden ratio is used in design as it is naturally harmonious. It’s why the rule of thirds in many different disciplines works. The ratio itself is 1:1.618…. and is considered the most pleasing to the eye.
It was first used in mathematics where two numbers are in this golden ratio subject to their ratio being equivalent to the sum of the larger two quantities. In simple terms, I broke down the dimensions of my design into the ratio 1:1.1618….
Used boxes and simple shapes like a circle to create four different designs that could be taken forward later in the construction of the character.

Placed the thumbnails in the top right hand corner that included the original thumbnails and also some face thumbnails. Then decided to take the character back one stage to check if the character is appealing. Also a name of Graceful George was given as an almost ironic title given the fact that the character is clumsy. Pose were also added in this stage based on the more refine favorite.
What I learnt
I learnt that especially with the giraffe character that thumb nailing based off a refined sketch can lead to the character being too realistic in places. I would have played with the neck being exaggerated to be a much longer length.
Using a thumbnail reference sheet would have helped with layout as it could be wrongly misinterpreted.
Creating the Construction Sheet for the Circus Animal Character
Process

Using an early human character construction sheet allowed me to just place the animal character over the layouts and created a cohesive look originally across my work using the design element of unity. This would create the content that would lead it to being attractive and understandable.

Similar to what was said at the previous stage but an example of what I mean can be seen in the above image. A lot of elements on one page is something I learnt early one is not helpful nor pleasing when trying to show a construction sheet.

Removed expressions as similar to human character I felt it unnecessary to include these on the construction sheet as they looked to refined. Also added colour and final line work to the poses and final image. Refined a new construction look as the one from the thumbnail stage looked over complex.

Added head heights as it felt like the character should be able to be scaled as when placed in a environment that has perspective. It would show size as well which is a fundamental element of design.
Also added a light shaded box around the poses to create a stronger contrast which would bring focus to the character rather than it being out of place..
I also added the stilts because it would act as self mockery due to the nature of the character being so tall. I decided to keep them as close enough to the giraffes hips with a bit of space to allow for harmony and compatibility in this complex design.

Decided against having no other poses as it shows how to view the character in different views. Decided to show my animal character performing slips as this would be similar to the personality notes. A clumsy circus giraffe.

Decided that because the giraffe is yellow mostly that a secondary colour scheme (purple and yellow) would help the sheet stand out compared to previous stages. I had to go over some colour theory to allow me to execute it effectively. Also contrast is a design element that emphasises the two elements of colour.

Finished off the poses although they seemed to distract from the other more finished digital drawings. After critical inspection I found that they might be in the wrong place and hence would need to be removed before advancing any further.

Removed the poses as they seemed unnecessary at this stage and were placed at an early stage of development. That being the Circus Animal Character Thumbnails and Concept Design.
Scaled up the stage by stage construction steps and added in a 3 bridging step for a more understandable construction stage. Added my name to create a more professional look.
Also added some presentation details such as making the sketch layer yellow against a completely purple tone to create a strong contrast.
I created a hierarchy amongst the limited typography which would create space for the giraffe to seem like the focal point of the page.
I learnt how useful colour theory can be when you want to show a different person from the original designer, how to construct the circus animal character. The name was also changed as Animal character seemed to be overly vague.
Animal Character Expression Sheet
Process
Expression reference from google images I used as inspiration.

Created the animal expressions by using the character stock expressions. A simple method like the one I chose allowed me to spend more time exaggerating and detailing the face. This meant I could redraw the character several times. A task a designer is all to familiar with in my opinion.

A quick expression sheet i decided to include as this would only further assist in recreating the characters face or head. These however look like a different style due to creating them from scratch with very little reference from the animal character construction sheet.
Constructing a turnaround based on the construction sheet
Process

I used again an earlier version of the human character sheet to quickly build up a similar animal character turnaround. At this point I had already had the construction sheet done.
I felt it would look like a unified project by having similar but different character designs based on the same process.

Changed the name of the sheet from Human character turnaround to Animal turnaround. Then I started off by outlining a very rough view sketch of the character. Made the 3/4 the most 3D as this could potentially be an important view going forward.

Took the final version of the character from the construction sheet to create the front and side view. I decided to add stilts to the character as a giraffe is already so tall so having stilts would emphasis a key characteristic of the character, that being its long legs.

Added a mane to the giraffe and also colored the side view to keep it in line with the other back and front views of the animal character turnaround. Also decided to remove the 3/4 temporarily as Photoshop was running slow at the time i was trying to create 4 different views.

Overlapping the front and side view allowed me to see roughly how the 3/4 view would be created. This is a technique I found that is sometimes done in 3D modelling software where you follow a similar method.
For 2D, I found it works just as well provided the program I am using has a opacity changer.

Made the line work for the 3/4 view of the animal character turnaround. Also added the purple colour scheme that I enjoyed using in the previous character construction and also the thumbnails and concept design.

Finished off the 3/4 view by adding colour to that view using the other three views as colour references. Added important horizontal lines to ensure the character would remain the same height at different points on the animals body. For example like the chin of the giraffe or where the stilts start and end.

The final version came out quite strong visually with the complimentary colour scheme. The addition of my name to the logo for further clarity on who created this Circus Animal Turnaround. I learnt that the character turnaround is just as import as the other sheets as it allows for a strong reference when placed in a environment that has perspective.
Short Evalaution
If I had more time I would have tried out more character designs for the animal circus character as it felt like I went for my first choice rather than exploring more around circus animals.
Overall with the circus animal I was at times working on a later step and trying to then cover myself by bringing it back a step in terms of research and development of the design. Going forward I would try to create the character step by step more in a similar fashion to how the human character was created. I just felt at times rushed for time.
In the future I will allocate more of my non study time to independent study time.
This would allow me to work on sections I did on the day and bring a cohesive style right from the beginning while bringing in multiple ideas, techniques and inspirations.
